
So after doing all of that sorting and purging and categorizing with Kelly over at her home school at Faithful Provisions headquarters, it’s time to talk about how we set it all back up. If you recall in Part 1 of this series, we pulled everything out of the space, grouped like with like as well as what items were used together. We discarded everything that was outdated, unused or not working. Then we looked at what was left – just the ‘good stuff’. We specifically sorted out things that Kelly used for planning – tools & materials that were strictly for her to create lesson plans but were not supposed to be accessible for the kids.
Tip: just because you spent good money on something or it seemed like a great idea at the time but you feel guilty because you never use it, does not mean you need to keep it.
The best part of getting organized is starting out fresh and looking at your space with new eyes. When Kelly and I took a real look at not only the limitations of her space but how she actually used it, we were able to be really creative with how we stored things.
Tip: When storing items, remember that the more you use something, the closer it needs to be to your work space. The less frequently you use something, the farther away it should be.
Turns out Kelly had a huge armoire in the room where her home school area is, as well as a small hall closet that wasn’t being used for much. You know how those closets get – things get dumped and forgotten. These were two under-utilized areas right near her home school space that we could use for storing less frequently used supplies. Once we had purged the area, turns out there was a lot more space than she thought!
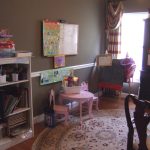
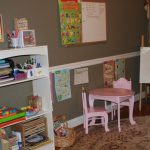
The process of getting things back in place was two-fold. First we grouped items together that were used together, and pulled out things that only Kelly used (lesson plan materials, planners, resource books, etc.). We used the armoire for lesson plan materials. We determined this because it was an area that was already near the desk where she did her planning, plus it was a storage piece that also held office supplies which could double as home school supplies.
We used the hall closet for things that were bulky or not as frequently used. We had shelves built in it – you know – you don’t have to live with the single shelf and rod that’s in there. Those shelves now hold puzzles, games, craft items and extra supplies so Kelly can ‘shop’ her closet to replenish the home school.
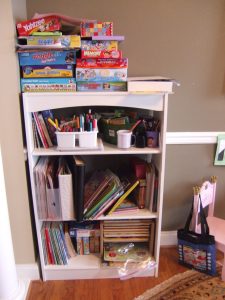
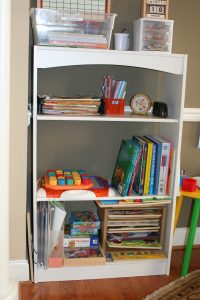
With the remaining items, we set up the smaller bookshelf and table to hold only those items that the kids used, and that were used regularly during home school or craft times. This area before was overloaded and chaotic but once only the supplies that were really being used were there, neatly binned and labeled, it became so much easier to find what was needed – even by the kids.
Tip: The best part about labeling is that not only can you find things – you know exactly where they go back. Even the kids! Label not only the bin or container but the shelf or location something belongs
Some of the materials we used:
> clear plastic bins with lids
> open Sterilite ‘holey’ bins
> stacking letter trays
> small open bins, cups & baskets Kelly already had
and my favorite tool of all . . .
> label maker (Brother P-Touch)
Organizing this space was not only fun but super productive for Kelly. Being a busy entrepreneur as well as a great home schooling mom, she needed to make her time as efficient as possible. Being organized can make the difference between getting things done . . . or not. For this busy mom, keeping up with home schooling just became a whole lot easier.
Hall closet & armoire pics . . .
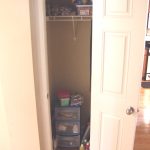
after
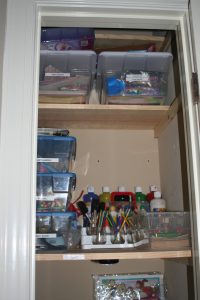
organized armoire storage
Don’t be afraid to think outside of your ‘box’ when it comes to storage. While some home school supplies were being stored here, they were scattered and mixed up with other things. Designating a space just for one purpose is one of the keys to being organized.
Money saving tips!
Don’t purchase any storage until you see what you need to store.
Any clear plastic container with or without a lid can be used for great storage, as can Ziploc bags.
Make your own cute labels with clip art and office supply store labels.
Stock up when things are on sale and create your own “store” in a closet, guest room, or other rarely used location. Shop your store for supplies when you run low.
Look for furniture or other supplies on sites like Craigs List or freecycle.org.
Barter organizing help with a friend in a similar situation – another home school mom or dad can be a big help.
Great materials are often found for little money at Target, Big Lots, Dollar General, Home Goods and more – you don’t need to shop specialty stores for great stuff.
Stay tuned for more organizing at Faithful Provisions . . . next we tackle the Home Office!

