When we moved to Nashville in 2005, I hadn’t yet started my journey as a professional organizer so while I was naturally organized, I sure didn’t have the knowledge I have today after 18 years of helping people move, unpack, and be organized! I’ll be honest, it was a bit of a hot mess looking back. We did a great job with a few things (wrangling pets, buttoning up things for the buyers of our house) but we really sucked at others (editing out our junk, labeling boxes, and making sure like things were packed together) which really made our unpacking process way more challenging than it needed to be. On the bright side, it gave me a lot of room to grow and reflect which means my pain is your gain!
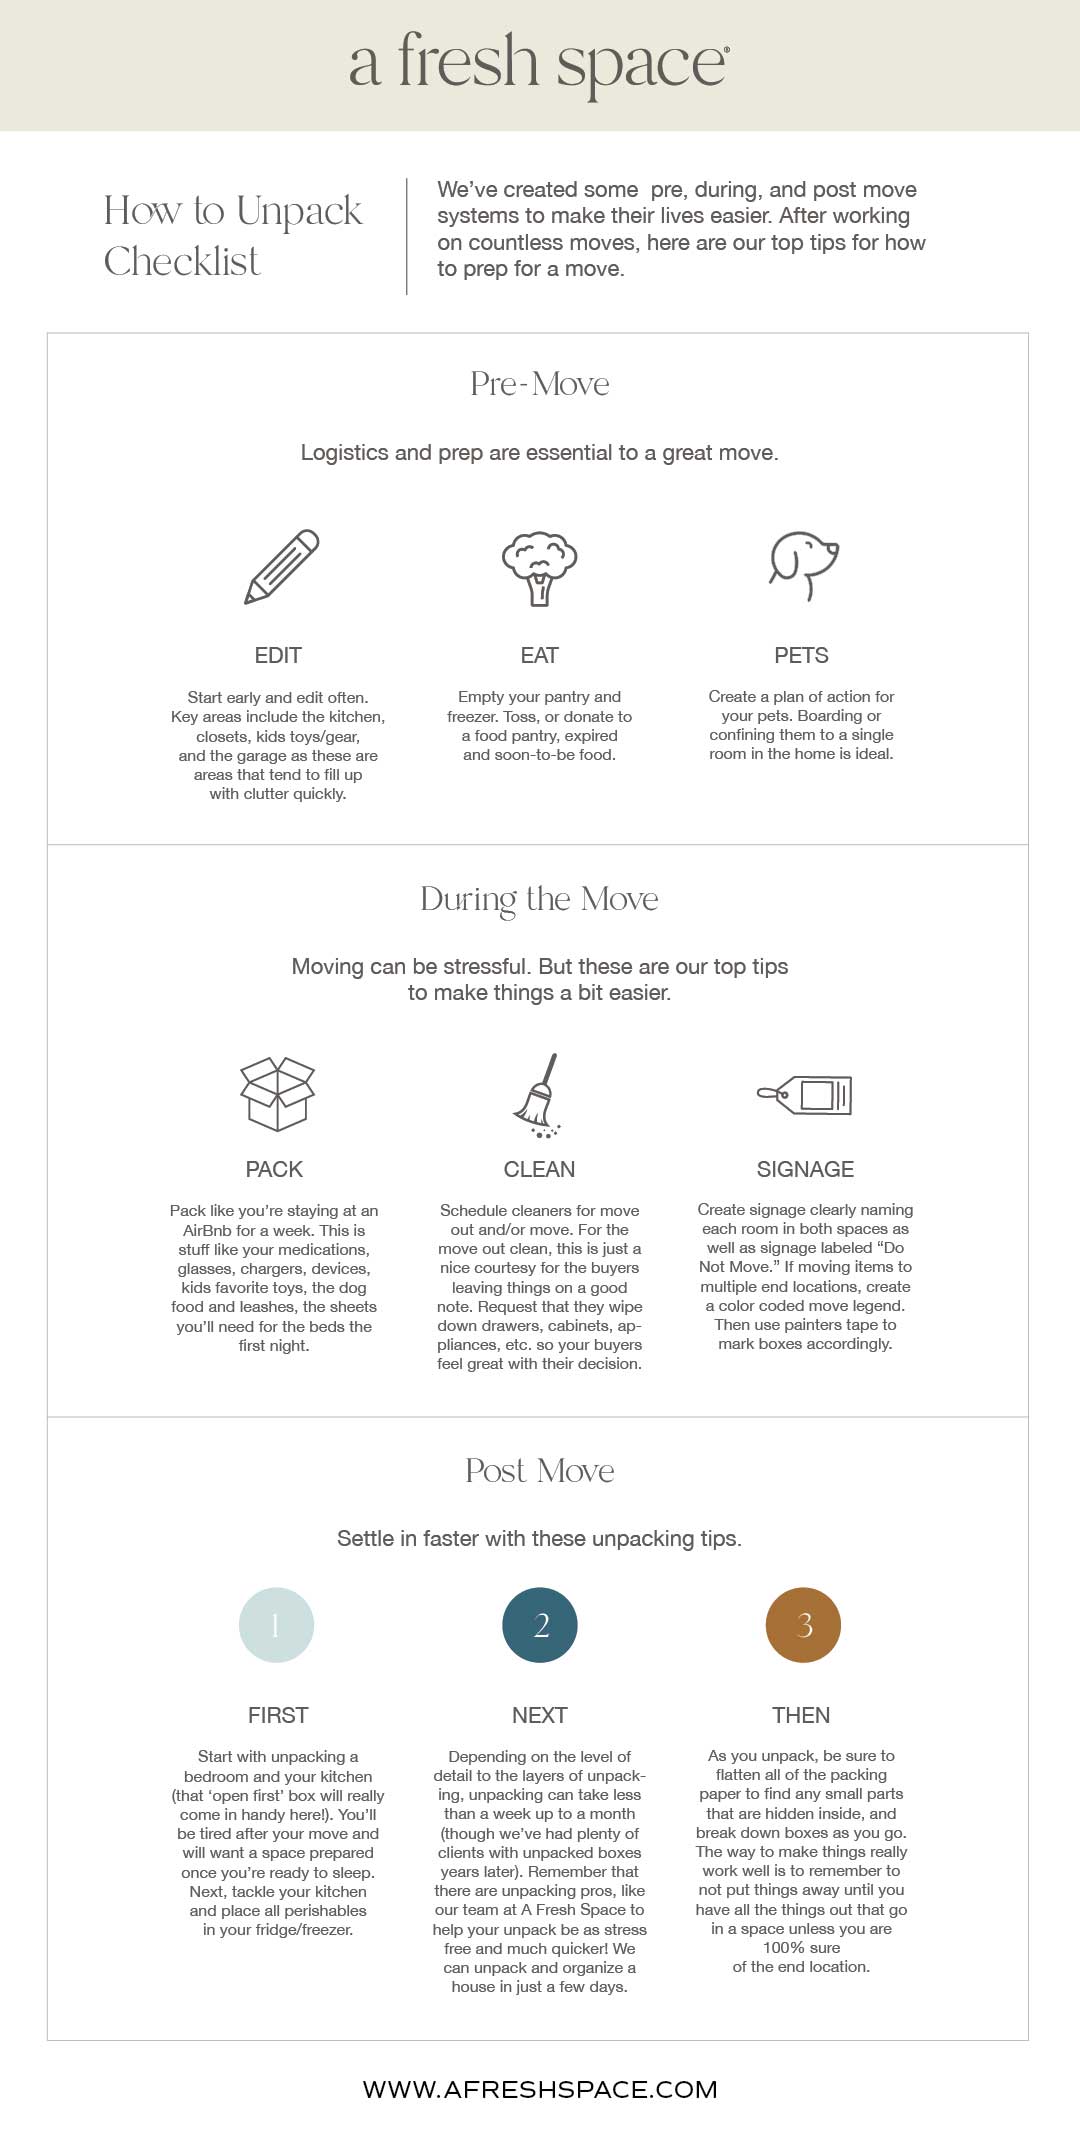
AFS got started in move management when our regular organizing clients started moving and needed our help. So we’ve created some awesome pre, during, and post move systems to make their lives easier. After working on countless moves, here are our top tips for how to prep for a move.
Pre-move.
Edit, edit, and then edit some more.
I can’t stress enough how much you should edit out every area of your home as time allows. Start early and edit often. You don’t need to pay to move things that you won’t need on the other end so this is a fantastic opportunity for a fresh start with a clean slate. Key areas include the kitchen, closets, kids toys/gear, and the garage as these are areas that tend to fill up with clutter quickly.
Eat up! Empty your pantry, freezer and fridge.
Spend down (meaning eat up!) your supply as much as you can before you move. Toss, or donate to a food pantry, expired and soon-to-be food. Bring coolers in for the move itself for transporting fridge and freezer items. This also applies to cleaning products – we generally recommend only transporting unopened items.
Pro tip: if you are storing your items for any length of time – it is not a good idea to pack food for storage due to risk of bugs or deterioration.
Designate a “stay with house” area.
This is anything that will stay with the house and help the new owners. Examples include: appliance manuals, specialty light bulbs for installed fixtures, appliance parts and accessories, remotes for tv’s, stereo equipment, fans, extra home hardware, etc. Typically we keep these in a laundry room drawer or create a clear bin that is labeled and leave it in the kitchen, laundry, or garage.
Pets!
Create a plan of action for your pets. We recommend that they not be on site during the pack and move for safety reasons. Pets can get extremely stressed during this process with things moving about and strange people touching their stuff. Boarding or confining them to a single room in the home is ideal, and if you need to move out to a transition residence between moves, be sure they are pet friendly or board them at a facility until you are back in the home and settled.
Labels and signage.
You all know we love color coding and labels, so trust us on this one that it isn’t overkill. Labeling reduces stress and confusion both within your current location and your new home. Create signage clearly naming each room in both spaces as well as signage labeled “Do Not Move.” If moving items to multiple end locations, create a color coded move legend. Then use painters tape to mark boxes accordingly. Label all items with where they are going, not necessarily where they are coming from.
Schedule a move out clean for your old house and move in for your new residence.
Schedule cleaners for move out and/or move. For the move out clean, this is just a nice courtesy for the buyers leaving things on a good note. Request that they wipe down drawers, cabinets, appliances, etc. so your buyers feel great with their decision.
For the move in clean, I recommend a two-phase approach. Phase one: a deep clean prior to move in, including cabinet drawers, shelves, baseboards, light fixtures, etc. Phase two: after the unpack is complete and all the boxes are gone so you can start out with a sparkling clean space.
Pack up the things you’ll need when you get there (and don’t let the movers pack them away!).
This is stuff like your medications, glasses, chargers, devices, kids favorite toys, the dog food and leashes, the sheets you’ll need for the beds the first night. It’s a great idea to pack an ‘open first’ box with basic kitchen things like your coffee pot, cutlery, and paper products. We always tell clients to pack their bags like they are staying at an AirBnB for a week. That way you don’t have to worry so much about getting your bedroom unpacked right away.
Once you arrive at your new home (and end destination). Here’s how to unpack.
What rooms should I unpack first?
Start with unpacking a bedroom and your kitchen (that ‘open first’ box will really come in handy here!). You’ll be tired after your move and will want a space prepared once you’re ready to sleep. Next, tackle your kitchen and place all perishables in your fridge/freezer. Getting the kitchen unpacked first is key to being able to settle in. Getting the kids settled in is usually a priority as well. Once you can find your underwear and make coffee, life seems ok.
How long does it take to fully unpack?
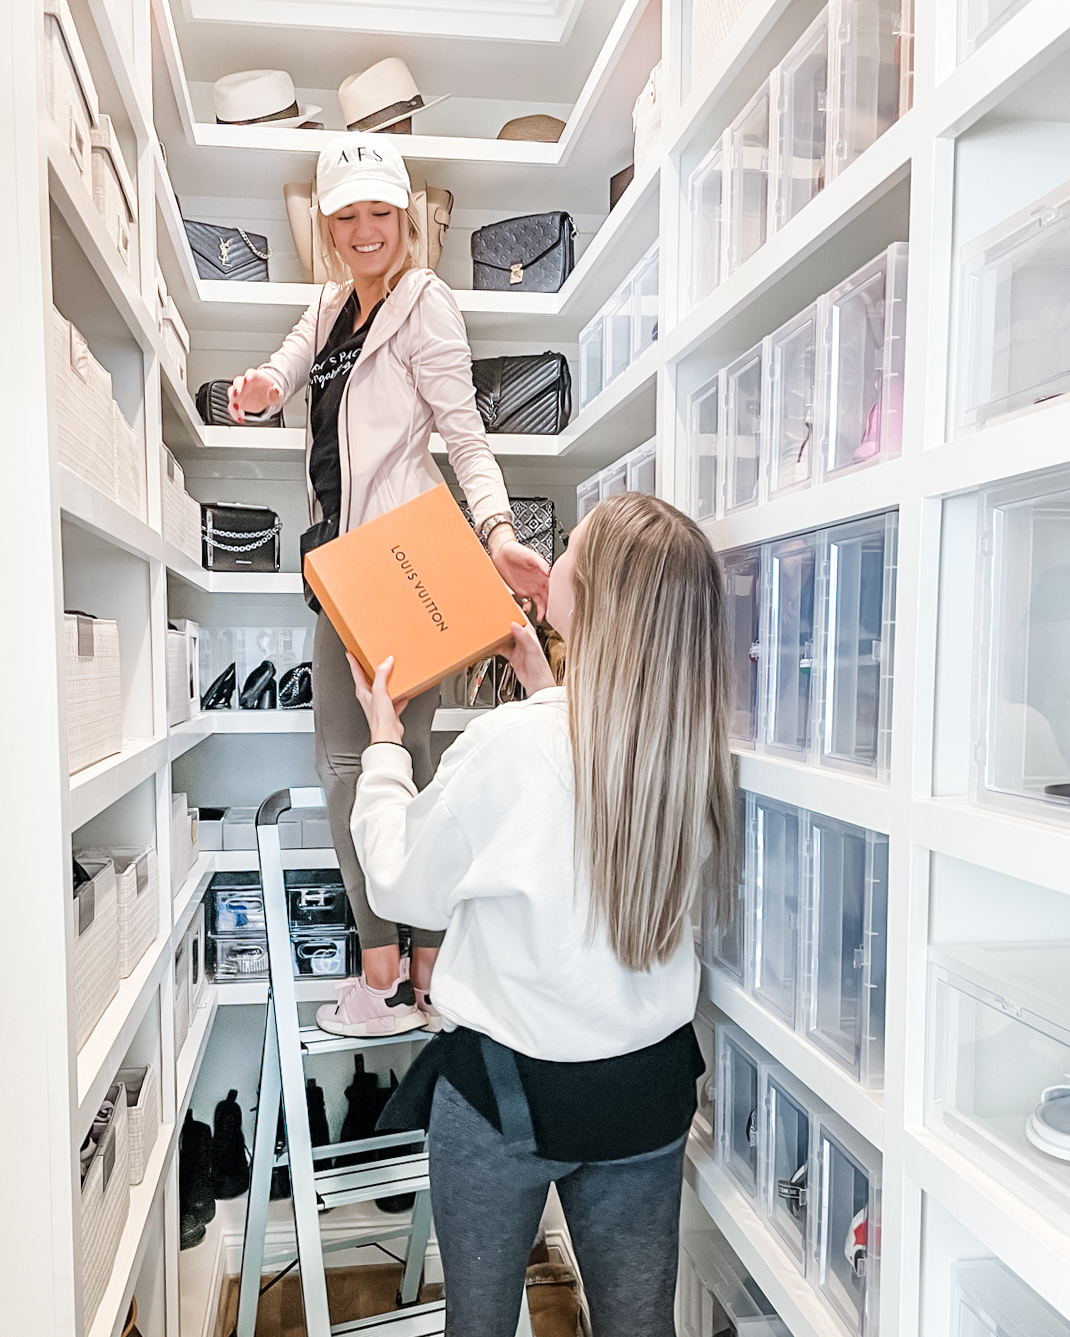
Depending on the level of detail to the layers of unpacking, unpacking can take less than a week up to a month (though we’ve had plenty of clients with unpacked boxes years later). While a DIY approach can save on budget, remember that there are unpacking pros, like our team at A Fresh Space to help your unpack be as stress free as possible – and much quicker! We can typically unpack and organize a house in just a few days.
What are the layers of unpacking?
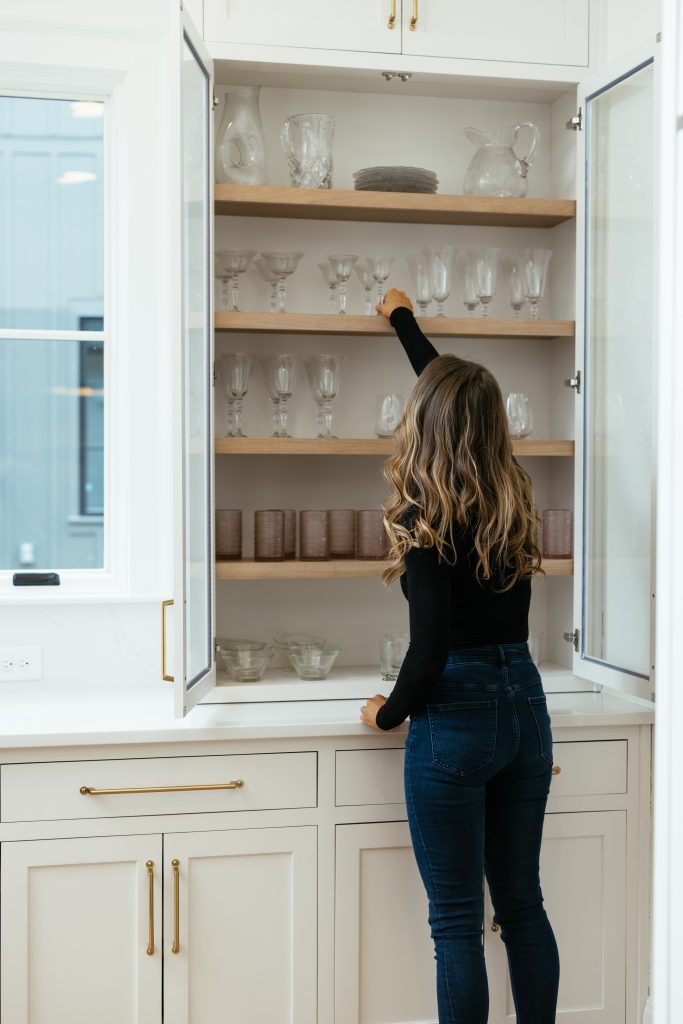
Remember everything has a place. As we unpack, we focus on the ways you use a space and where things should go. Then we assess existing closet layouts, shelving and storage solutions for containment and organization.
As you unpack, be sure to flatten all of the packing paper to find any small parts that are hidden inside, and break down boxes as you go.
Pro Tip: post these for free on your local Facebook marketplace or Buy Nothing group!
The way to make things really work well is to remember to not put things away until you have all the things out that go in a space unless you are 100% sure of the end location. By this I mean don’t start putting away your small appliances until you see how many you have, identify the frequency of use, and what your space will hold. Once you know the volume of a certain category, you can cross reference that with how frequently you’ll need to get to it which will let you make an informed decision about where it lives. Generally where the plates, glasses, and silverware lives is pretty straightforward, but all the other stuff needs to be thought out.
Pro Tip: create a backstock area for pantry items and paper products in the laundry or garage, and use upper shelves for less frequently used small appliances and storage containers/entertaining. You don’t need your covered cake plate front and center.
This can be overwhelming but the best part is that our team can knock out unpacking at a fraction of the time. When doing this yourself – it is better to take this process slowly because you’re likely to organize it later.
Save the checklist below.